How to Disassemble a Ruger LCP: A Step-by-Step Guide
The Ruger LCP (Lightweight Compact Pistol) is a popular choice for concealed carry due to its small size and ease of use. However, like any firearm, it requires regular cleaning and maintenance to ensure reliable operation. A crucial part of this maintenance is knowing how to safely and effectively disassemble a Ruger LCP. This guide provides a detailed, step-by-step process for disassembling your Ruger LCP, as well as important safety precautions.
Safety First: Essential Precautions Before Disassembly
Before you even think about disassembling your Ruger LCP, safety must be your top priority. Neglecting these steps can lead to accidental discharge or damage to your firearm.
- Ensure the Firearm is Unloaded: This is the most critical step. Remove the magazine and visually inspect the chamber to confirm it is empty. Do this in a safe direction, away from yourself and others. Double-check!
- Point in a Safe Direction: Always point the firearm in a safe direction where an accidental discharge would not cause injury or damage.
- Wear Eye Protection: Small parts can sometimes spring loose during disassembly. Eye protection will prevent injury.
- Work in a Clean, Well-Lit Area: A clean workspace will help you keep track of all the parts. Good lighting will allow you to see clearly and avoid mistakes.
- Consult the Owner’s Manual: The Ruger LCP owner’s manual contains valuable information about the firearm’s operation and maintenance. Refer to it for specific instructions and warnings.
Tools You’ll Need
While the Ruger LCP is relatively simple to disassemble, having the right tools will make the process easier and prevent damage to the firearm.
- A Small Punch or Tool: You’ll need a small punch or similar tool (like a small screwdriver or even a pen) to depress the takedown pin. A dedicated punch set is ideal, but a suitable substitute will work.
- Cleaning Mat: A cleaning mat will protect your work surface and prevent small parts from rolling away.
- Optional: Gun Cleaning Solvent and Lubricant: While not strictly necessary for disassembly, having these on hand is a good idea if you plan to clean your Ruger LCP after disassembly.
Step-by-Step Disassembly Guide for the Ruger LCP
Now that you’ve taken the necessary safety precautions and gathered your tools, you can begin disassembling your Ruger LCP. Follow these steps carefully:
- Remove the Magazine: Ensure the magazine is removed from the firearm.
- Rack the Slide: Pull the slide fully to the rear and release it. This will chamber a round if one is present.
- Visually Inspect the Chamber: Lock the slide back and visually inspect the chamber to ensure it is empty. Do this in a safe direction.
- Release the Slide: With the chamber confirmed empty, release the slide.
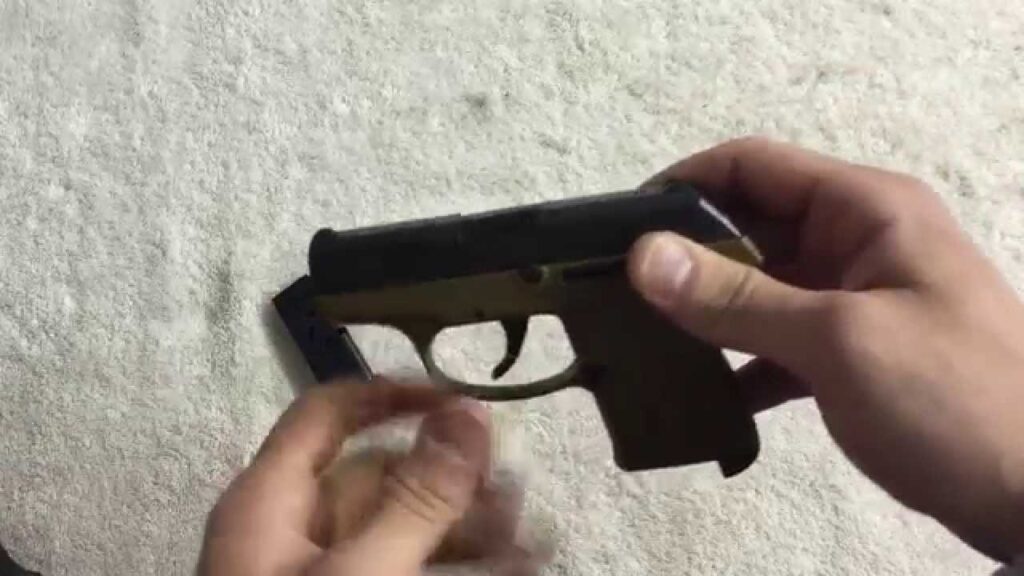
- Depress the Takedown Pin: Locate the takedown pin on the left side of the frame, just above the trigger. Using your punch or tool, depress the takedown pin inward. You should be able to push it in slightly.
- Pull the Slide Forward: While holding the takedown pin depressed, pull the slide forward off the frame. It may require a little wiggling.
- Remove the Recoil Spring Assembly: With the slide removed, you can now access the recoil spring assembly. Gently remove it from the slide. Pay attention to the orientation of the spring for reassembly.
- Remove the Barrel: The barrel should now be loose in the slide. Carefully remove it.
Congratulations! You have successfully disassembled your Ruger LCP. Now you can clean and inspect the individual components.
Cleaning and Inspection
After disassembling your Ruger LCP, take the opportunity to clean and inspect the parts. Use a gun cleaning solvent and brushes to remove any fouling or debris. Inspect the barrel for any signs of damage or wear. Check the recoil spring for kinks or breaks. A well-maintained firearm is a reliable firearm.
Reassembly: Putting It All Back Together
Reassembly is essentially the reverse of the disassembly process. However, it’s important to pay attention to detail and ensure that all parts are properly aligned.
- Reinstall the Barrel: Place the barrel back into the slide.
- Reinstall the Recoil Spring Assembly: Reinstall the recoil spring assembly into the slide, ensuring it’s oriented correctly (as noted during disassembly).
- Slide onto the Frame: Align the slide with the frame rails and slide it back onto the frame until it clicks into place. You may need to slightly depress the takedown pin again to allow the slide to pass.
- Check Functionality: After reassembly, perform a function check to ensure that the firearm operates correctly. Rack the slide, dry-fire (in a safe direction!), and check the trigger pull.
Troubleshooting Tips
Sometimes, things don’t go as smoothly as planned during disassembly or reassembly. Here are a few troubleshooting tips:
- Slide Won’t Come Off: Ensure the takedown pin is fully depressed. Try wiggling the slide slightly while pulling it forward.
- Recoil Spring Assembly is Difficult to Remove: Ensure the slide is fully removed from the frame. The recoil spring assembly should slide out relatively easily.
- Slide Won’t Go Back On: Ensure the takedown pin is aligned and that the slide is properly aligned with the frame rails.
Important Considerations and Safety Reminders
Disassembling a Ruger LCP is a relatively straightforward process, but it’s crucial to prioritize safety and follow the instructions carefully. Always double-check that the firearm is unloaded before beginning any maintenance. If you’re not comfortable disassembling your Ruger LCP yourself, consult a qualified gunsmith.
Regular cleaning and maintenance are essential for the proper functioning and longevity of your Ruger LCP. By following this guide, you can confidently disassemble, clean, and reassemble your firearm, ensuring its reliability for years to come. Remember always prioritize safety above all else. This process of disassembling your Ruger LCP helps you understand the firearm better and ensures its optimal performance. The ability to disassemble your Ruger LCP is crucial for proper maintenance. Learning how to disassemble a Ruger LCP is a valuable skill for any owner. Practice makes perfect when it comes to disassembling and reassembling any firearm, including the Ruger LCP. Properly disassembling your Ruger LCP will allow for effective cleaning and lubrication. The steps to disassemble your Ruger LCP are straightforward once understood. This guide aims to simplify the process to disassemble the Ruger LCP. Understanding the process to disassemble a Ruger LCP contributes to responsible gun ownership. Many owners find it useful to know how to disassemble their Ruger LCP. Knowing how to disassemble a Ruger LCP can improve the firearm’s lifespan.
[See also: Ruger LCP Maintenance Guide]
[See also: Common Ruger LCP Problems and Solutions]
[See also: Best Holsters for Ruger LCP]
