Capturing the Ethereal Beauty: A Guide to Nimbus Landscape Photography
Nimbus clouds, with their dramatic forms and ability to transform the light, offer a unique opportunity for landscape photographers. Mastering the art of nimbus landscape photography allows you to capture scenes filled with atmosphere, mood, and a sense of the sublime. This guide will explore the techniques, considerations, and creative approaches necessary to elevate your nimbus landscape images.
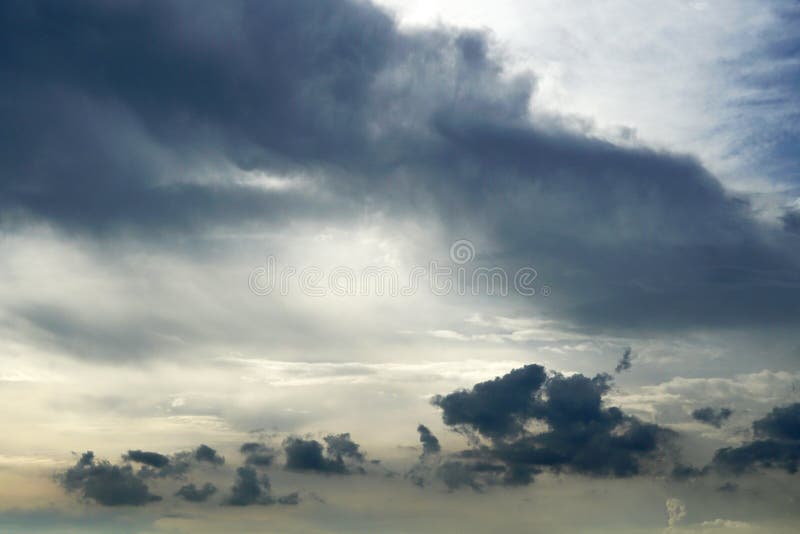
Understanding Nimbus Clouds
Before diving into the technical aspects, it’s crucial to understand what nimbus clouds are. Nimbus clouds are typically dark, gray, and often associated with precipitation. They are low-level clouds, usually found below 6,500 feet, and can bring rain, snow, or even hail. Their thick, dense structure is what creates such dramatic light and shadow, making them ideal subjects for landscape photography.
Types of Nimbus Clouds
- Nimbostratus: These are flat, featureless gray clouds that often cover the entire sky. They are associated with steady, light to moderate rain or snow.
- Cumulonimbus: These are towering, thundercloud-like clouds that can produce heavy rain, lightning, and even tornadoes. They are often anvil-shaped at the top.
Essential Gear for Nimbus Landscape Photography
Having the right equipment is essential for capturing stunning nimbus landscape photographs. Here’s a breakdown of the key gear:
- Camera: A DSLR or mirrorless camera with manual controls is ideal for adjusting settings to suit the changing light conditions.
- Lenses: A wide-angle lens (16-35mm) is perfect for capturing expansive landscapes with dramatic skies. A telephoto lens (70-200mm or longer) can be useful for isolating specific features within the landscape and compressing perspective.
- Tripod: A sturdy tripod is crucial for sharp images, especially in low-light conditions or when using slow shutter speeds.
- Filters:
- Polarizing Filter: Reduces glare and reflections, enhances colors, and deepens blue skies.
- Neutral Density (ND) Filter: Reduces the amount of light entering the lens, allowing for longer exposures and motion blur effects, even in bright conditions. Useful for smoothing water or cloud movement.
- Graduated Neutral Density (GND) Filter: Darkens the sky while preserving detail in the foreground. Essential for balancing exposure when the sky is much brighter than the land.
- Remote Shutter Release: Minimizes camera shake when using long exposures.
- Rain Gear: Protects your camera and lenses from rain and snow.
Planning Your Nimbus Landscape Shoot
Successful nimbus landscape photography requires careful planning. Here are some key considerations:
Weather Forecasting
Monitor weather forecasts closely to identify days with potential for dramatic cloud formations. Look for days with unstable atmospheric conditions, which often lead to the development of cumulonimbus clouds. Be aware of potential hazards such as lightning and strong winds.
Location Scouting
Scout locations in advance to identify interesting compositions and viewpoints. Consider how the landscape will interact with the clouds and light. Look for foreground elements such as trees, rocks, or bodies of water that can add depth and interest to your images. [See also: Best Landscape Photography Locations]
Timing is Everything
The best light for nimbus landscape photography is often found during the golden hour (shortly after sunrise and before sunset) and the blue hour (the period of twilight just before sunrise and after sunset). These times offer soft, warm light that can enhance the drama of the clouds. However, don’t dismiss shooting during other times of the day, especially when the light is constantly changing due to passing storms.
Techniques for Capturing Nimbus Landscapes
Once you’re in the field, several techniques can help you capture stunning nimbus landscape images:
Exposure Settings
- Aperture: Use a narrow aperture (f/8 to f/16) to maximize depth of field and ensure sharpness throughout the image.
- Shutter Speed: Adjust shutter speed to achieve the desired exposure. Use a tripod for slower shutter speeds to avoid camera shake. Experiment with long exposures to blur cloud movement and create a sense of motion.
- ISO: Keep ISO as low as possible (ISO 100 or 200) to minimize noise. Increase ISO only when necessary to maintain a reasonable shutter speed.
Compositional Techniques
- Rule of Thirds: Divide the frame into thirds both horizontally and vertically, and place key elements along these lines or at their intersections.
- Leading Lines: Use lines (e.g., roads, rivers, fences) to guide the viewer’s eye into the scene.
- Foreground Interest: Include interesting elements in the foreground to add depth and scale to the image.
- Balance: Create a sense of balance by distributing visual weight evenly throughout the frame.
- Negative Space: Use empty space to draw attention to the main subject.
Metering and Focusing
- Metering: Use evaluative (matrix) metering to assess the overall light in the scene. Adjust exposure compensation as needed to prevent the sky from being overexposed. Consider using spot metering to meter specific areas of the scene.
- Focusing: Focus on a point one-third of the way into the scene to maximize depth of field. Use manual focus for precise control.
Post-Processing Nimbus Landscape Images
Post-processing is an essential part of nimbus landscape photography. Here are some common adjustments you can make in software like Adobe Lightroom or Photoshop:
- Exposure and Contrast: Adjust exposure and contrast to enhance the dynamic range of the image.
- White Balance: Adjust white balance to correct color casts and create a more natural look.
- Highlights and Shadows: Recover detail in the highlights and shadows to reveal hidden textures and tones.
- Clarity and Dehaze: Increase clarity and dehaze to enhance sharpness and reduce atmospheric haze.
- Color Saturation and Vibrance: Adjust color saturation and vibrance to enhance the colors in the scene. Be careful not to over-saturate the colors, as this can create an unnatural look.
- Sharpening: Apply sharpening to enhance detail and bring out textures.
- Noise Reduction: Reduce noise in the image, especially in the shadows.
- Local Adjustments: Use local adjustment tools (e.g., adjustment brush, graduated filter) to make targeted adjustments to specific areas of the image. For example, you can darken the sky or brighten the foreground.
Creative Approaches to Nimbus Landscape Photography
Beyond the technical aspects, nimbus landscape photography offers opportunities for creative expression. Here are some ideas to explore:
- Black and White Conversion: Convert your images to black and white to emphasize the textures and tones of the clouds.
- Long Exposure Photography: Use long exposures to blur cloud movement and create a sense of motion.
- Panoramic Photography: Capture wide panoramic views to showcase the vastness of the landscape and the dramatic sky.
- Infrared Photography: Explore infrared photography to create surreal and otherworldly images.
- Time-Lapse Photography: Create time-lapse videos to capture the movement of the clouds over time. [See also: Time-Lapse Photography Tips]
Safety Considerations
When photographing nimbus landscapes, especially during storms, safety is paramount. Be aware of the following:
- Lightning: Seek shelter immediately if you see or hear lightning. Avoid standing in open areas or near tall objects.
- Strong Winds: Be prepared for strong winds, which can make it difficult to hold your camera steady and can also pose a safety hazard.
- Flash Floods: Be aware of the potential for flash floods, especially in low-lying areas.
- Hypothermia: Dress warmly and be prepared for cold temperatures, especially at higher elevations.
- Stay Informed: Monitor weather updates and heed warnings from local authorities.
Conclusion
Nimbus landscape photography is a challenging but rewarding pursuit. By understanding the nature of nimbus clouds, mastering the necessary techniques, and embracing creative approaches, you can capture images that convey the awe-inspiring beauty and power of nature. Remember to prioritize safety and always be respectful of the environment. With practice and patience, you can create stunning nimbus landscape photographs that will captivate and inspire.
