Effortless Elegance: Mastering Easy Henna Tattoo Designs for Beginners
Henna tattoos, also known as mehndi, have been a cherished art form for centuries, deeply rooted in cultural traditions across South Asia, the Middle East, and Africa. More than just skin decoration, they symbolize joy, celebration, and blessings. Today, the allure of henna extends far beyond its traditional contexts, captivating individuals worldwide with its natural beauty and temporary nature. For those new to this mesmerizing art, the prospect of creating intricate designs might seem daunting. However, with a little practice and the right guidance, anyone can master easy henna tattoo designs and adorn themselves with stunning temporary art.
This comprehensive guide aims to demystify the art of henna, providing beginners with the knowledge and confidence to create their own beautiful henna tattoo easy designs. We’ll explore the essential tools, techniques, and design ideas to get you started on your henna journey. Whether you’re looking to add a touch of elegance to a special occasion or simply explore a new creative outlet, this guide will equip you with everything you need to succeed.
Understanding Henna: A Brief Overview
Before diving into the designs, it’s crucial to understand the basics of henna. Natural henna is derived from the *Lawsonia inermis* plant. The leaves are dried, crushed into a fine powder, and then mixed with a liquid (typically water, lemon juice, or strong tea) to create a paste. This paste is then applied to the skin, where it stains the outer layer, leaving a temporary tattoo that can last from one to three weeks, depending on skin type, aftercare, and the quality of the henna paste.
It is absolutely vital to use natural henna. Black henna, often marketed as a quicker and more intense alternative, contains a chemical dye called paraphenylenediamine (PPD), which can cause severe allergic reactions, permanent scarring, and long-term health problems. Always ensure that the henna you are using is 100% natural and safe for skin application. Look for a greenish-brown color in the paste and a natural, earthy scent. If it smells strongly chemical, avoid using it.
Essential Tools and Materials for Henna Art
To embark on your henna journey, you’ll need a few essential tools and materials:
- Henna Paste: You can either buy pre-made henna cones or make your own paste. Pre-made cones are convenient for beginners, but making your own allows for greater control over the ingredients and consistency.
- Applicator Bottles or Cones: These are used to apply the henna paste to the skin. Cones are commonly used and can be made from cellophane or purchased pre-rolled. Applicator bottles with fine tips offer greater precision.
- Essential Oils: Adding a few drops of essential oil, such as lavender, tea tree, or eucalyptus, to your henna paste can enhance the staining process and provide a pleasant aroma.
- Lemon Juice and Sugar Mixture: This mixture is used to seal the henna design after application, helping to keep the paste moist and allowing for a deeper stain.
- Cotton Balls or Tissues: For cleaning up mistakes and blotting excess paste.
- Stencils (Optional): Stencils can be helpful for beginners who want to create precise designs.
Preparing Your Skin for Henna Application
Proper skin preparation is crucial for achieving a beautiful and long-lasting henna stain. Follow these steps:
- Cleanse the Skin: Wash the area where you’ll be applying henna with soap and water. Remove any lotions, oils, or makeup.
- Exfoliate (Optional): Gently exfoliating the skin can help to remove dead skin cells, allowing the henna to penetrate more effectively.
- Dry the Skin: Ensure the skin is completely dry before applying henna.
Mastering Basic Henna Techniques
Before attempting complex designs, it’s essential to master a few basic henna techniques:
- Line Work: Practice drawing straight lines, curved lines, and dotted lines. Consistency is key.
- Circles and Spirals: These are fundamental elements in many henna designs. Practice drawing perfect circles and smooth spirals.
- Petals and Leaves: Learn to create simple petal and leaf shapes. Experiment with different sizes and orientations.
- Filling: Practice filling in shapes with solid henna or creating shaded effects.
Easy Henna Tattoo Designs for Beginners: Step-by-Step
Now, let’s explore some easy henna tattoo designs that are perfect for beginners:
Simple Floral Design
- Start by drawing a small circle in the center of your desired area.
- Create five petals around the circle, forming a simple flower.
- Add small dots or teardrop shapes between the petals.
- Draw a stem extending from the flower.
- Add leaves along the stem, varying their size and shape.
Geometric Pattern
- Draw a series of parallel lines.
- Add small triangles or squares along the lines, creating a repeating pattern.
- Fill in some of the shapes with solid henna for added contrast.
Wrist Cuff Design
- Draw two parallel lines around your wrist.
- Add small circles or dots between the lines.
- Draw simple floral or geometric motifs along the lines.
Finger Design
- Draw a line down the center of your finger.
- Add small dots or swirls along the line.
- Create a simple floral motif at the base of the finger.
Tips and Tricks for a Perfect Henna Stain
To achieve a dark and long-lasting henna stain, follow these tips:
- Keep the Paste Moist: Apply the lemon juice and sugar mixture to the henna design every 15-20 minutes to keep the paste moist.
- Wrap the Design: After the henna has dried slightly, wrap the area with medical tape or a cloth to keep the paste in contact with the skin and protect the design.
- Leave the Paste On for as Long as Possible: The longer you leave the henna paste on, the darker the stain will be. Aim for at least 2-6 hours, or even overnight.
- Avoid Water: After removing the henna paste, avoid washing the area with soap and water for at least 12-24 hours. Water can hinder the oxidation process and result in a lighter stain.
- Apply Natural Oils: After removing the paste, apply a natural oil, such as coconut oil or olive oil, to the area to keep the skin moisturized and protect the stain.
Troubleshooting Common Henna Problems
Even with careful preparation and application, you might encounter some common henna problems. Here’s how to troubleshoot them:
- Light Stain: Ensure you’re using natural henna paste, leaving the paste on for a sufficient amount of time, and avoiding water immediately after removal.
- Uneven Stain: This can be caused by uneven application of the paste or variations in skin thickness. Practice your technique and ensure even coverage.
- Smudging: Avoid touching the henna paste while it’s drying. If smudging occurs, gently clean up the area with a cotton swab dipped in water.
- Allergic Reaction: If you experience any itching, redness, or swelling after applying henna, remove the paste immediately and consult a doctor. This could be a sign of an allergic reaction to black henna or other ingredients in the paste. Remember, true henna tattoo easy designs should not cause allergic reactions when natural henna is used.
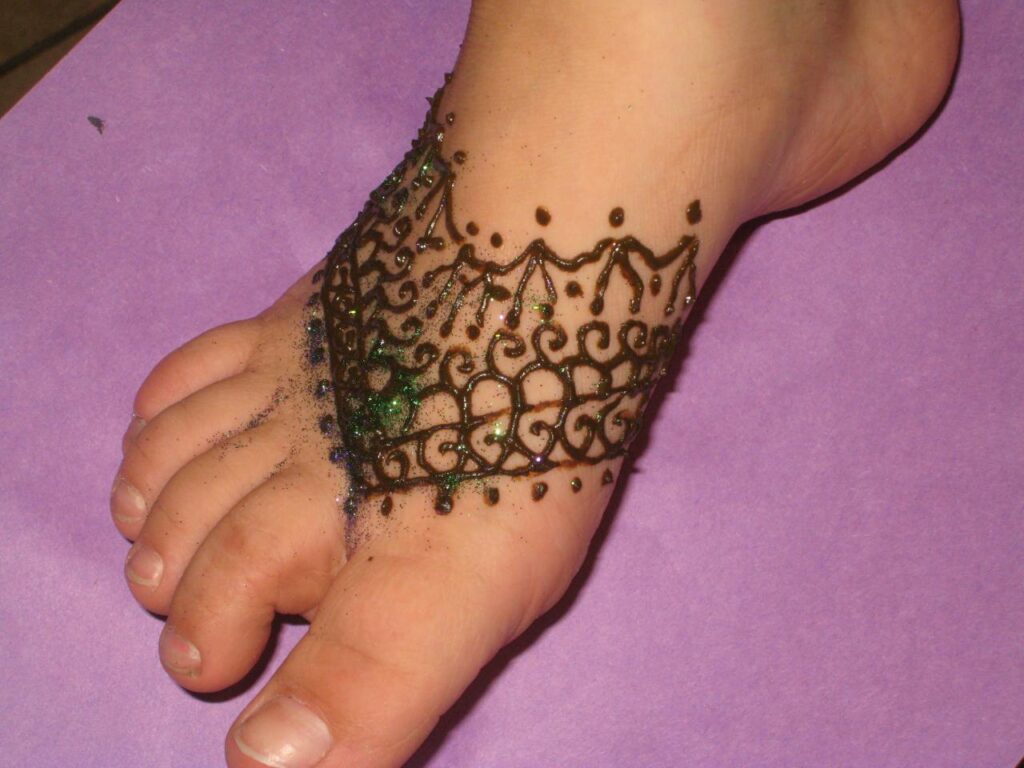
Exploring More Intricate Henna Designs (After Mastering the Basics)
Once you’ve mastered the easy henna tattoo designs outlined above, you can start exploring more intricate patterns. Look to traditional mehndi designs for inspiration, such as:
- Indian Mehndi: Characterized by intricate floral and paisley patterns, often covering the hands and feet extensively.
- Arabic Mehndi: Known for its bold floral designs with large, flowing patterns and less emphasis on filling spaces.
- African Mehndi: Often features geometric shapes and bold lines, with a focus on symmetry and simplicity.
Experiment with different design elements, such as mandalas, vines, and animal motifs. Consider taking a henna workshop or online course to further develop your skills. Remember, practice makes perfect! The more you practice, the more confident and skilled you’ll become in creating beautiful and unique henna tattoo easy designs.
The Cultural Significance of Henna
While enjoying the aesthetic appeal of henna tattoo easy designs, it’s important to acknowledge and respect the cultural significance of henna. Henna has been used for centuries in various cultures for ceremonial purposes, particularly during weddings, festivals, and other celebrations. It is often seen as a symbol of good luck, prosperity, and beauty. When wearing henna, be mindful of its cultural roots and avoid appropriating or misrepresenting its significance. Educate yourself about the traditions and customs associated with henna in different cultures.
Conclusion: Embrace the Art of Henna
Creating henna tattoo easy designs is a rewarding and enjoyable experience. With the right tools, techniques, and a little patience, anyone can master this beautiful art form. Start with simple designs and gradually work your way up to more complex patterns. Remember to use natural henna paste, practice proper skin preparation, and follow the tips for achieving a dark and long-lasting stain. Embrace the creativity and cultural richness of henna, and adorn yourself with stunning temporary art that reflects your personal style and appreciation for this ancient tradition. The journey of learning henna tattoo easy designs is a continuous one, filled with creativity and self-expression. So, gather your supplies, unleash your inner artist, and embark on your henna adventure today! [See also: Henna Aftercare Tips for Long-Lasting Designs] [See also: Choosing the Right Henna Cone for Beginners]
